Cache-man
Wannabe Webmaster
- Joined
- Mar 16, 2005
- Messages
- 840
- Reaction score
- 0
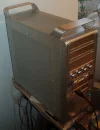
Alpine EZ-Cool (G5-Style) ATX Case
Aluminium Finish

This case is an excellent choice for amateurs, modders and high-end PC enthusiasts alike, as it offers stunning looks, superior ventilation, tool-less assembly, pre-stealthed 5 ¼” drive bays and a respectably reasonable price tag.
Introduction
From the moment this case arrived, its high quality was noticeable. The box is printed in colour on glossy finish corrugated cardboard – there are several pictures of the G5-inspired case adorning the box, with the words “Professional PC DIY” across the front and back, and another nice touch was the plastic carry handle on the top. Admittedly, it’s just a box, but a lot of high-end component producers miss out little details like this in order to save a few pence per unit on manufacturing costs, so it’s nice to see Alpine making the effort here.

After opening the box up, and prizing the actual case out of the polystyrene packaging, the build quality was ever so more apparent, the finish of the case is absolutely stunning with an electroplated silver brushed aluminium finish (although I believe the chassis is actually made of steel). Within the case is a box containing the handles and feet, and a bag containing instructions, and screws for mounting extra fans to the panels, and for attaching the handles and feet.
The cases perforated facia and panels take a few moments go get used to, but once you get over the thought of it looking like a huge cheese-grater, you’ll fall in love with this case.
Assembly
The first thing to do is attach the feet and handles to the case, each of which is attached using four thumb-screw type fixing with the supplied hex-key. The feet have a rubber pad on them, which stops your case from sliding around on your desk, but are otherwise identical to the top handles, so please ensure you attach these the right way round. While the handles only appear to screw directly into the top panel, without any apparent support structure, they are surprisingly sturdy, and I had no worries at all about lifting the fully loaded system with them, this should make for easy transportation if you attend LAN parties. Once the handles and feet are on, the case itself is complete, and is ready to install everything into.
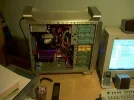
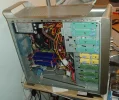
The first main step with assembly is to install the motherboard which in this particular build is a full-ATX Gigabyte 8IK1100 rev2. Now when I mentioned earlier that installation was tool-less, I wasn’t entirely correct, as when securing the motherboard to the case chassis, you have to clip it in place using the quite unique spacer-clips, and then screw a single screw through the motherboards centre-most mounting hole. This is a very easy process, and actually holds the board quite securely, also allowing plenty of space behind the board for ventilation and to prevent short circuits with the board on the motherboard tray.
The next step was installing the CPU and heatsink, memory and graphics card, which was pretty standard, although there is plenty of room to get your hand into this case, making things even easier.
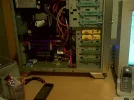
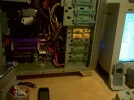
Now for hard drive installation, this is a breeze thanks to the quick-release rails. Simply slot the hard drive into a free space, and twist the two clips to lock the drive into place. The same goes for installing the floppy drive and optical drives – just stick it in and lock into place, it really couldn’t be any easier.


There are two options for installing the optical drives, either behind the stealth facia in the top two 5 ¼” bays, or removing the front bezels and exposing the front of you drive in the lower two 5 ¼” bays. I decided to hide my Pioneer DVR108 DVD writer behind one of the top bay fronts by simply popping off the entire front facia, slotting in the drive and clipping it into place, and the pushing the facia back into place. This neat little feature enables you to easily colour match your drives with the colour of your case, giving it a more professional finish, as I’m sure you’ll all agree that beige drives in a sexy silver case just spoil the overall effect.
The final step is to insert the power supply, and connect everything up. This again was easy due to the amount of space within the case, although I’m disappointed to see the absence of a removable PSU backplate, which would enable you to slot a PSU in from the rear of the case. However slotting in the PSU from inside proved no problem, and once screwed into place it holds itself pretty solidly. Now just connect power to the motherboard and devices, and hook up all of the clearly labelled front panel ports (2xUSB, mic, line-out, and mini-1394) to the motherboard header pins, and we’re done. The side panel just slots back into place, and is fixed by two thumb-screws at the top and bottom of the rear edge.
Powering Up
I added a UV cold-cathode inside the case before powering up, and once turned on the entire case emits hundreds of spots of spooky purple light – very cool, but would probably look much better with a brighter blue or green cathode!
One thing I did notice when powering up was that the case produced a little more noise than my previous one did, although this is obviously due to sound escaping from the hundreds of tiny holes that are all over the case, and doesn’t provide any great problems. There is a bonus side to all of these holes too, that they allow a huge quantity of fresh air to be sucked in all over the case. The PSU and rear system fan suck hot air out of the computer, and a fan in the centre of the side panel provides some inward airflow, but rather that circulating hot air continuously around (like other more sealed systems), some air flow will naturally enter the case through the side panels, and some of the hot air that would normally just circulate around the top of your case now simply rises through the holes in the top.
Testing the optical drive proved a pleasant experience. A gentle push of the eject button, and the drive bay door drops down and out comes the disk loading tray. Another push of the eject button and the tray retracts back into the computer, closing the bay door behind it.
Conclusion
This case looks sexy, is an absolute pleasure to work with due to the lack of tools needed, and is modestly priced at £48.18 (inc VAT from www.aria.co.uk) which should attract the budget conscious buyer and dedicated hardware enthusiast alike.
The case doesn’t come with a PSU, although most of us would prefer to install our own anyway, and there is no PSU backplate, which means PSU’s have to be fitted from inside.
Quick release drive rails work great, although could benefit from some kind of rubber inserts to reduce drive vibration.
The provision to simply attach many more fans inside the side panels (even provision for a 120mm fitting) is a great feature, and fans can be placed to blow over graphics card, CPU, or centrally over the memory!
All internal edges are folded, so theres no risk of catching your fingers and the external finish is superb.

Overall – feature packed, sexy case, with great price!
Aluminium Finish

This case is an excellent choice for amateurs, modders and high-end PC enthusiasts alike, as it offers stunning looks, superior ventilation, tool-less assembly, pre-stealthed 5 ¼” drive bays and a respectably reasonable price tag.
Introduction
From the moment this case arrived, its high quality was noticeable. The box is printed in colour on glossy finish corrugated cardboard – there are several pictures of the G5-inspired case adorning the box, with the words “Professional PC DIY” across the front and back, and another nice touch was the plastic carry handle on the top. Admittedly, it’s just a box, but a lot of high-end component producers miss out little details like this in order to save a few pence per unit on manufacturing costs, so it’s nice to see Alpine making the effort here.

The cases perforated facia and panels take a few moments go get used to, but once you get over the thought of it looking like a huge cheese-grater, you’ll fall in love with this case.
Assembly
The first thing to do is attach the feet and handles to the case, each of which is attached using four thumb-screw type fixing with the supplied hex-key. The feet have a rubber pad on them, which stops your case from sliding around on your desk, but are otherwise identical to the top handles, so please ensure you attach these the right way round. While the handles only appear to screw directly into the top panel, without any apparent support structure, they are surprisingly sturdy, and I had no worries at all about lifting the fully loaded system with them, this should make for easy transportation if you attend LAN parties. Once the handles and feet are on, the case itself is complete, and is ready to install everything into.
The first main step with assembly is to install the motherboard which in this particular build is a full-ATX Gigabyte 8IK1100 rev2. Now when I mentioned earlier that installation was tool-less, I wasn’t entirely correct, as when securing the motherboard to the case chassis, you have to clip it in place using the quite unique spacer-clips, and then screw a single screw through the motherboards centre-most mounting hole. This is a very easy process, and actually holds the board quite securely, also allowing plenty of space behind the board for ventilation and to prevent short circuits with the board on the motherboard tray.
The next step was installing the CPU and heatsink, memory and graphics card, which was pretty standard, although there is plenty of room to get your hand into this case, making things even easier.
Now for hard drive installation, this is a breeze thanks to the quick-release rails. Simply slot the hard drive into a free space, and twist the two clips to lock the drive into place. The same goes for installing the floppy drive and optical drives – just stick it in and lock into place, it really couldn’t be any easier.


There are two options for installing the optical drives, either behind the stealth facia in the top two 5 ¼” bays, or removing the front bezels and exposing the front of you drive in the lower two 5 ¼” bays. I decided to hide my Pioneer DVR108 DVD writer behind one of the top bay fronts by simply popping off the entire front facia, slotting in the drive and clipping it into place, and the pushing the facia back into place. This neat little feature enables you to easily colour match your drives with the colour of your case, giving it a more professional finish, as I’m sure you’ll all agree that beige drives in a sexy silver case just spoil the overall effect.
The final step is to insert the power supply, and connect everything up. This again was easy due to the amount of space within the case, although I’m disappointed to see the absence of a removable PSU backplate, which would enable you to slot a PSU in from the rear of the case. However slotting in the PSU from inside proved no problem, and once screwed into place it holds itself pretty solidly. Now just connect power to the motherboard and devices, and hook up all of the clearly labelled front panel ports (2xUSB, mic, line-out, and mini-1394) to the motherboard header pins, and we’re done. The side panel just slots back into place, and is fixed by two thumb-screws at the top and bottom of the rear edge.
Powering Up
I added a UV cold-cathode inside the case before powering up, and once turned on the entire case emits hundreds of spots of spooky purple light – very cool, but would probably look much better with a brighter blue or green cathode!
One thing I did notice when powering up was that the case produced a little more noise than my previous one did, although this is obviously due to sound escaping from the hundreds of tiny holes that are all over the case, and doesn’t provide any great problems. There is a bonus side to all of these holes too, that they allow a huge quantity of fresh air to be sucked in all over the case. The PSU and rear system fan suck hot air out of the computer, and a fan in the centre of the side panel provides some inward airflow, but rather that circulating hot air continuously around (like other more sealed systems), some air flow will naturally enter the case through the side panels, and some of the hot air that would normally just circulate around the top of your case now simply rises through the holes in the top.
Testing the optical drive proved a pleasant experience. A gentle push of the eject button, and the drive bay door drops down and out comes the disk loading tray. Another push of the eject button and the tray retracts back into the computer, closing the bay door behind it.
Conclusion
This case looks sexy, is an absolute pleasure to work with due to the lack of tools needed, and is modestly priced at £48.18 (inc VAT from www.aria.co.uk) which should attract the budget conscious buyer and dedicated hardware enthusiast alike.
The case doesn’t come with a PSU, although most of us would prefer to install our own anyway, and there is no PSU backplate, which means PSU’s have to be fitted from inside.
Quick release drive rails work great, although could benefit from some kind of rubber inserts to reduce drive vibration.
The provision to simply attach many more fans inside the side panels (even provision for a 120mm fitting) is a great feature, and fans can be placed to blow over graphics card, CPU, or centrally over the memory!
All internal edges are folded, so theres no risk of catching your fingers and the external finish is superb.

Overall – feature packed, sexy case, with great price!


 (Not to worry this time though as you've got your webspace sorted


 lol ...